- HubPages»
- Games, Toys, and Hobbies»
- Computer & Video Games»
- Online Video Games
Dragon Nest Green Dragon Guide
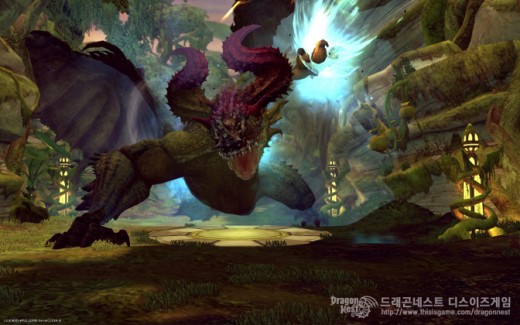
Dragon Nest Green Dragon Guide
When it comes to online MMORPGs, you have the world famous paid offerings – things like Ultima Online was and World of Warcraft is now – and then you have the free to play offers. And while there used to be a huge difference between the two, the gap is slowly closing – and in the case of one of the world’s most popular free to play MMORPGs Dragon Nest, the gap is shut, and they may have even take the lead.
A graphical stunner that many have said looks like a better World of Warcraft combined with the free to play nature and a totally immersive and exciting game, you would be hard pressed to find any problems with the game. Challenging enough to be exciting and keep the pressure up for experienced pros but simple enough to not alienate new gamers, this is the kind of platform you can spend hours and hours in without ever getting bored – especially if you battle the Green Dragon.
You will need a bit of help to get through this stage of the game however, and we’ve specifically designed the following guide to give you all the information to pass this critical mission. Remember though that this is the best way we’ve found to navigate this part of the game – while this guide will push you through the end successfully you should feel free to make any changes or try new methods. After all, that’s what Dragon Nest is all about, isn’t it?
Let’s get started. (Disclaimer: This guide is attributed to: v2seraph & chaose5, and the whole FREEDOM guild of CDN.)
The Green Dragon Nest is definitely one of the most challenging nests ever. (Well expect more actually). In this guide we'll run you through the most effective strategies to finishing GDN.
Some notes on the Boss:
- Weak to light
- High dark resist
- Critical resist: 5000
Stage One
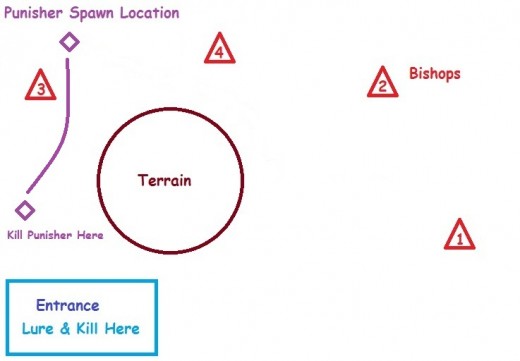
This is the initial stage of the quest, where you will be challenged with defeating not only 4 Archbishops but also their summoned Punisher as well. Not exactly the easiest way to start things off, but when you go about this stage systematically you’ll be able to take care of things pretty quickly.
The important thing you remember is that all of the Archbishops that you’ll have to vanquish need to be killed only after their Punisher has been dropped. This can get a little confusing in the heat of things – especially if you just wade into the middle as the Archbishops will only activate after you’ve passed near them.
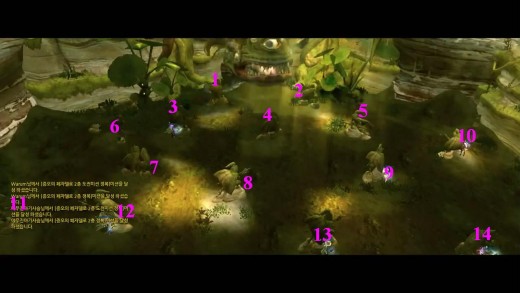
What you need to do is creep up on each one and take them on in order, making sure to crush their Punisher first and then killing them (if you kill the Archbishop first he’ll just be revived and the cycle will continue). Remember also that if you do end up activating more than one Archbishop at a time, which can happen because of the mobs that will spawn from time to time, that you need to drop the Punisher that goes with his Archbishop. This is made easier when you are able to separate them from each other because of the Dark Aura which boosts their power. The order needed is shown:
Stage 1 - Fallen Bishop
Some notes on the Boss:
- Weak to fire
- High dark and ice resist
- Critical resist: 6250
Stage Two
This stage is progressively harder than the first (yeah, I know) and you’ll be forced with taking down the Poison Golem Morgan. Not exactly a walk I the park but definitely nowhere near the top of the food chain when it comes to bosses, you will actually want to spend more time focusing on the other elements of this stage than the boss. This is not to suggest that you can afford to ignore Morgan (you can’t, he’ll make quick work of you), but that you need to be on the lookout for the poison gas that is dispersed on the field every single minute of the stage.
To avoid the gas you need to hit the fountain as soon as you see the notice, or slide into the air current that is created by the platform that is glowing. Speed buff will help incredible here, and if you can cast Highland you should. Poisoning will cause confusion and flip the direction arrow, making things much harder than they need to be.
Stage 2 - Poison Golem
Some notes on the Boss:
- Weak to dark
- High light resist
- Critical resist: 5000
Stage Three
This is the White Eye Cyclops stage, and if you’ve played the Stage 3 Lava Golem in SDN you’ll know the basics of what needs to be done here. The mission critical thing to remember in this stage is that when the warning hits the screen you all make it to a statue to hide behind – but only one character per statue. Ignore this and try to sneak two behind a statue or in the event that somebody doesn’t make it and the whole party will be killed.
Understand that you will be hit with a confusion roar right off the bat that will push your whole part back some – you cannot block this attack no matter what. Not only will you pushed a little bit back on the field but you will also be forced to deal with the Confusion Debuff, where your directional keys are flipped. This means down is up and up is down, and will be much more difficult to keep straight in the heat of battle I assure you. You’ll have to stay behind your statue and wait until the AOE poison attack has passed, causing the boss to fall asleep – this is where you deal your damage.
Stage 3 - Kraken
Some notes on the boss:
- No elemental weakness or resist
- Critical resist 15000
Stage Four
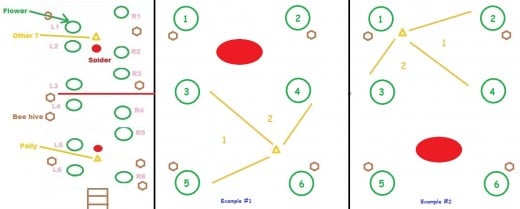
Stage Four gives you a bit of a breather before things really crank up, but can still get out of hand if you aren’t paying attention. You’ll be fighting the Swamp Queen Zebel in this stage, and not will you have to deal with two big old nasty spiders but you’ll have to deal with a literal army of smaller swamp spiders as well. This swarm and mob can get out of hand if you aren’t systematic and work as a team, and you also have to worry about the scarab swim that can decimate the whole team. Make sure you are jumping onto the platform in unison when the notification hits the screen or it’ll be lights out.
Stage 4 - Swamp Queen
Stage Five
Stage Five is just one step from the final stage with the Green Dragon, and with all frankness can be a major pain in the rear end. One of the more powerful setup bosses you will have to deal with, Kalahan can be more than a handful for even an experienced team that has worked together.
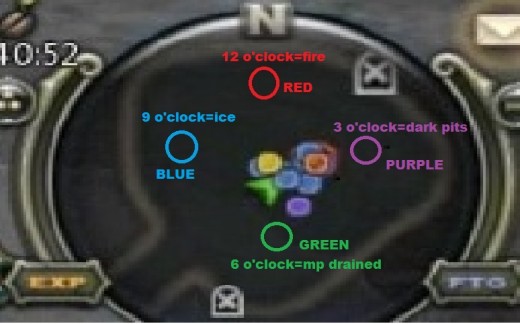
Be aware that this boss can make short work of the fight if you are not totally in sync with your team. There are a couple of ways to handle this guy, but the best is to make sure you clear all buffs and then slam him with a shockwave which will throw him off his feet for a few seconds. Then you’ll need to summon some black holes all around which can deal incredible damage and flip him all over the place – but you need to be smart about this so that it doesn’t backfire.
Stage 5 - Kalahan
Stage Six - The Green Dragon
The final stage, Stage Six, is where you’ll face down the Green Dragon himself. This is one of the most fun battles you will be able to have in a quest, and a victory that will validate the whole experience for yourself.
Initial Phase
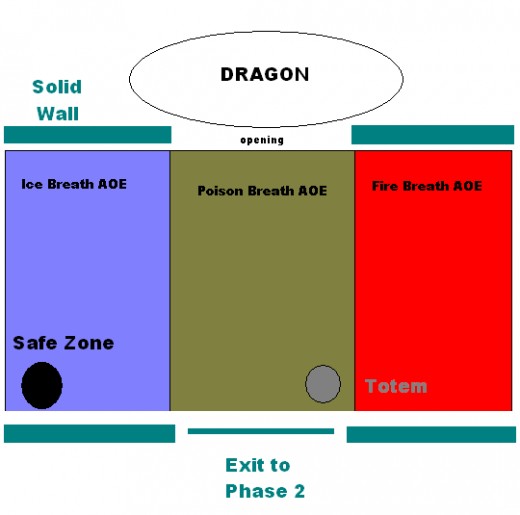
By now you’ll have learned that Kalahan was only in his human form in the past stage, and will have now morphed into the beastly Green Dragon. The most important thing for you to do is to move as far back as you can from the dragon attacks, and get as many of your team back as possible. This will allow you to deal damage from afar without having to worry about getting crushed in the process, and is critical for success.
While you need to hand back to avoid getting crushed by the claw swipe attacks, you also need to do deal damage as soon as claw strike is finished – this is the only time he is left exposed and a prime time to do your best. You’ll also need to be aware of the summon motion for Ice Breath is, because if you hand back in the recommended area you could get hit with it – you will need to dodge the attack when you see it being casted and then get back in position before the next attack.
Green Dragon Phase 1
Phase 2
Once you’ve completed the initial stage of this mission you will be hit with a couple of waves of monsters – but don’t worry, the dragon will not attack while you deal with his minions (at least in the first 40 seconds).
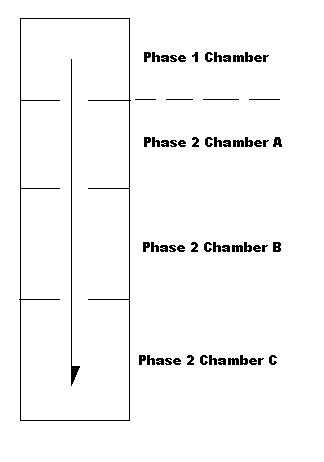
Green Dragon Phase 2
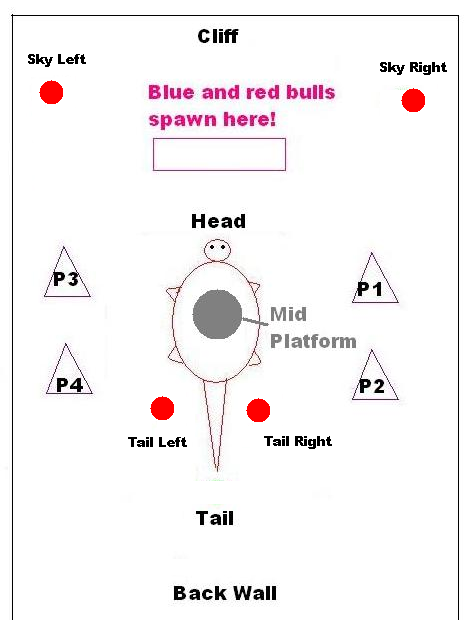
Final Phase
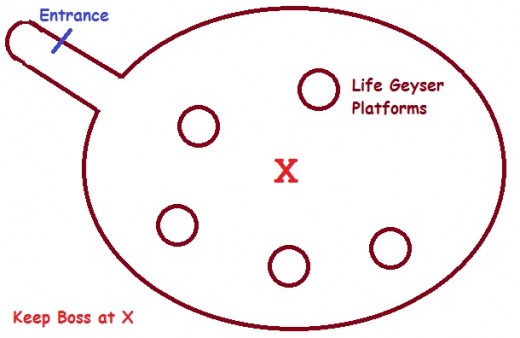
Once you have taken care of the waves of minions the battle will be pushed to another phase, where you’ll be fighting in a larger area with four heraldic towers. From here you’ll want to work on destroying all of the heraldic towers in a systematic way while dealing damage from the leg area of the creature. You will want to look out for tail swipe attacks as well as flying and poison breath (which can crush a party in a few seconds and close the Stage)
Once you’ve dropped all of the towers, you will need to run to the middle of the platform in the center to avoid complete annihilation. From here on out it’s dealing damage to the beast as he lands before and after casting spells and looking out for any and all attacks.
There ya go, good luck!
(Disclaimer: This guide is attributed to: v2seraph & chaose5, and the whole FREEDOM guild of CDN.)

